Are you struggling to generate quality leads on Facebook? With competition higher than ever, capturing attention is a real challenge. That’s where Facebook Lead Generation Ads come in—a game-changing tool that not only grabs your audience’s attention with engaging creatives and hooks but also makes conversion seamless.
Once a potential customer clicks on your ad, they’re instantly presented with a pre-filled form—no need to visit external websites or navigate away from Facebook. This frictionless experience increases the chances of form completion, delivering quality leads with minimal effort.
In this guide, we’ll break down everything you need to know to create, optimize, and maximize lead generation ads that draw in your ideal customers and help your business thrive.
Let’s dive in!
Reasons Why Facebook Lead Ads Can Be Useful for the Growth of Your Business
Imagine you have a business, and want new ways to reach your potential clients. Cold calling and direct emails are traditional marketing methods that feel costly, outdated, and time-consuming. You want something faster, smarter, more efficient. That’s where Facebook Lead Ads come into play as a core foundation of digital marketing.
Step-by-Step Guide to Run a High-Converting Facebook Lead Ad
In this blog, we’ll take you through every step from setting up your campaign to maximizing it for ultimate results. Whether you are a newbie or want to optimize your strategy, try these steps to design a high-converting Facebook Lead Ad.
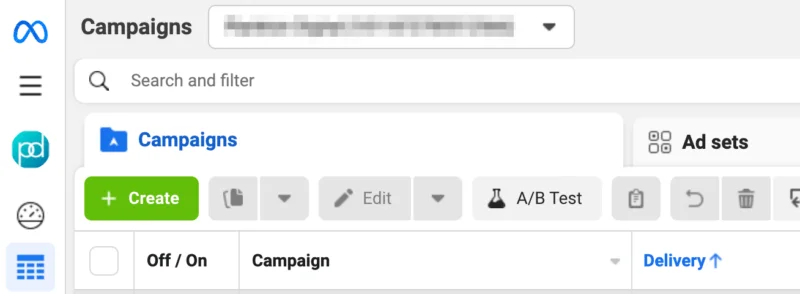
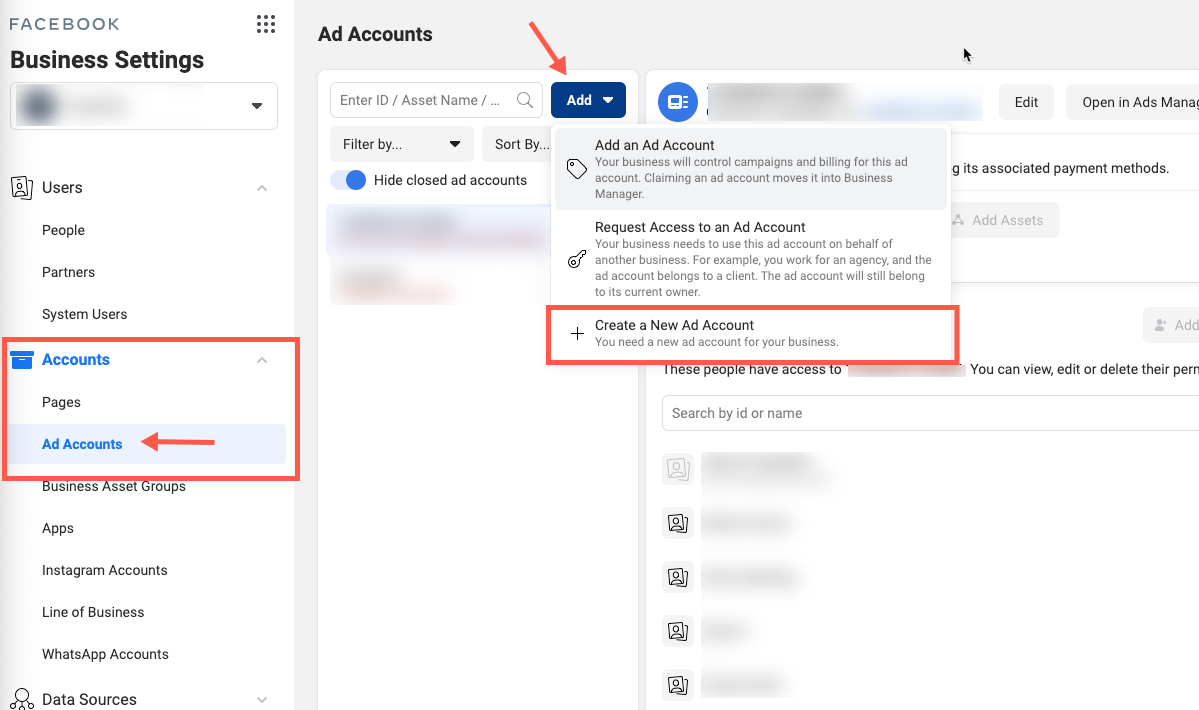
Step 1: Create Lead Ad Campaign
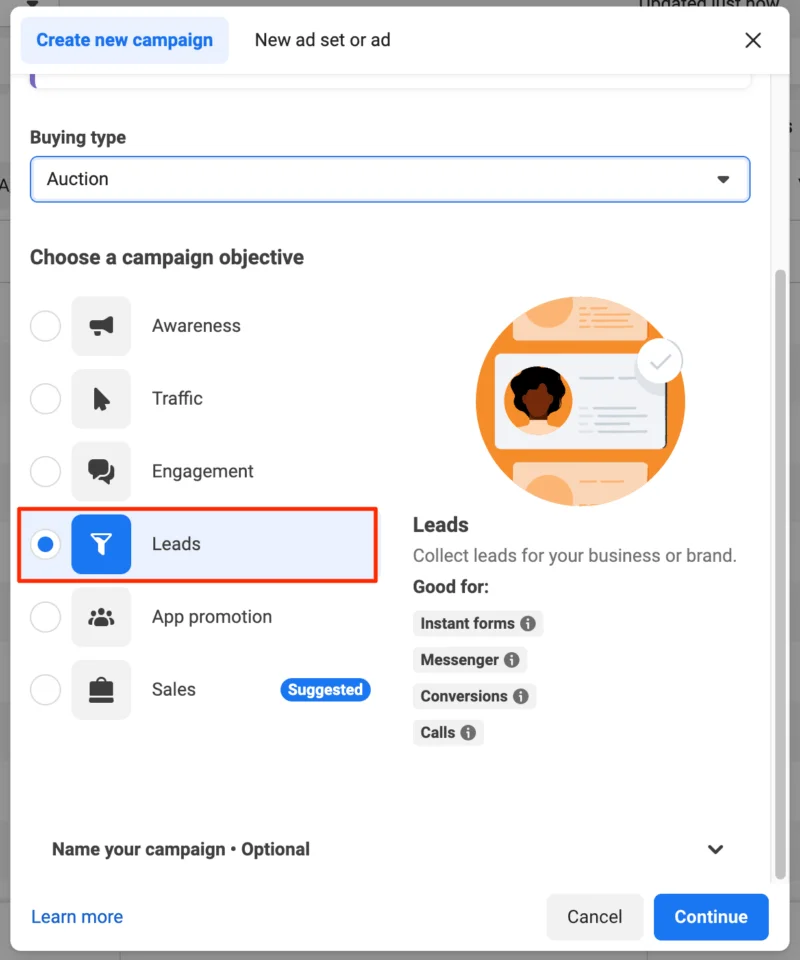
Go to Ads Manager and click on the create button. This is where you set yourself a goal. If you want to collect prospects, choose the Lead Generation campaign objective.
When selected, click ‘Continue’ to proceed.
Pro Tip: Your ad campaign should start with a definitive goal. Your objective is lead generation, so let’s start.
Step 2: Name Your Campaign
For creating a successful lead generation ad, it is important to give your campaign a clear and descriptive name. It should reflect the objective, target audience, or specific offer. For example, “Back-to-School Promo – Lead Gen – Parents” is more effective than just “Lead Campaign.”
Pro Tip: Keep your campaign name short yet informative. Include the date, audience, or specific goal to make tracking easier.
Step 3: Set Target Audience
Your ad’s success broadly depends on reaching the right people. Use Facebook’s targeting options to define your audience based on demographics, interests, behaviors, or even custom audiences from your email lists.
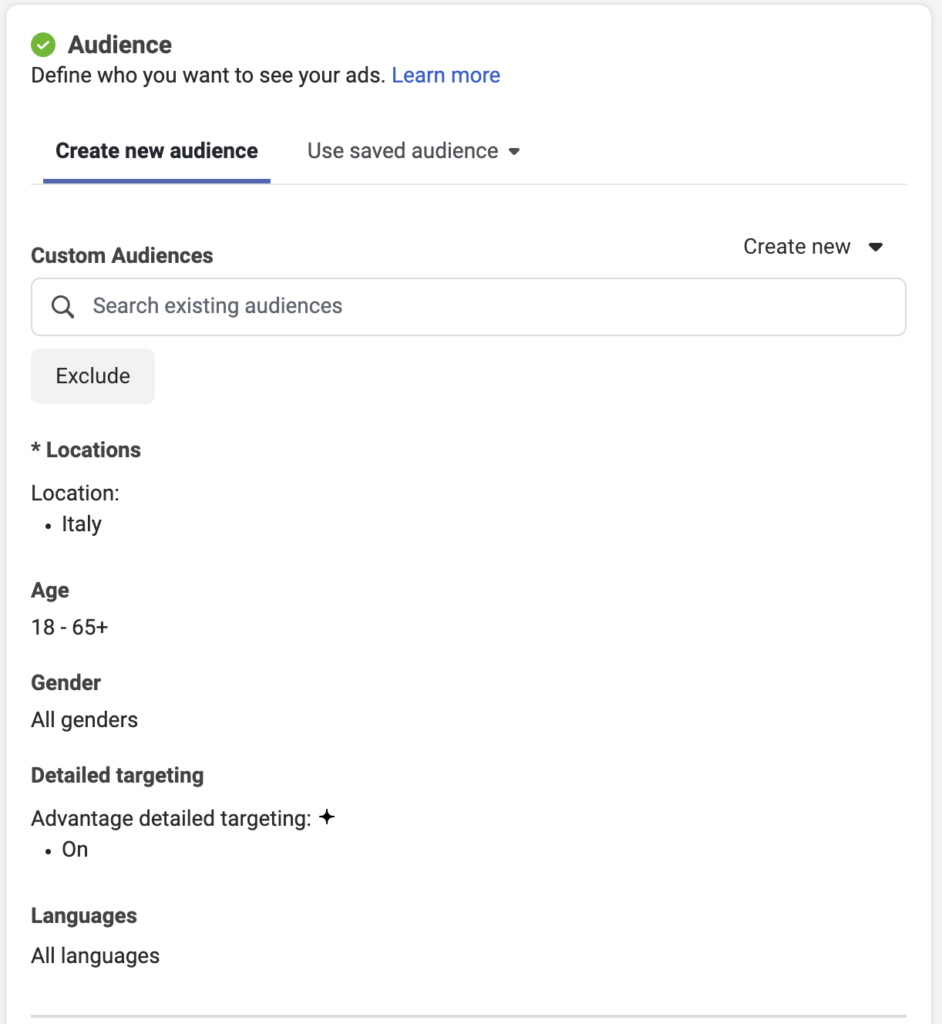
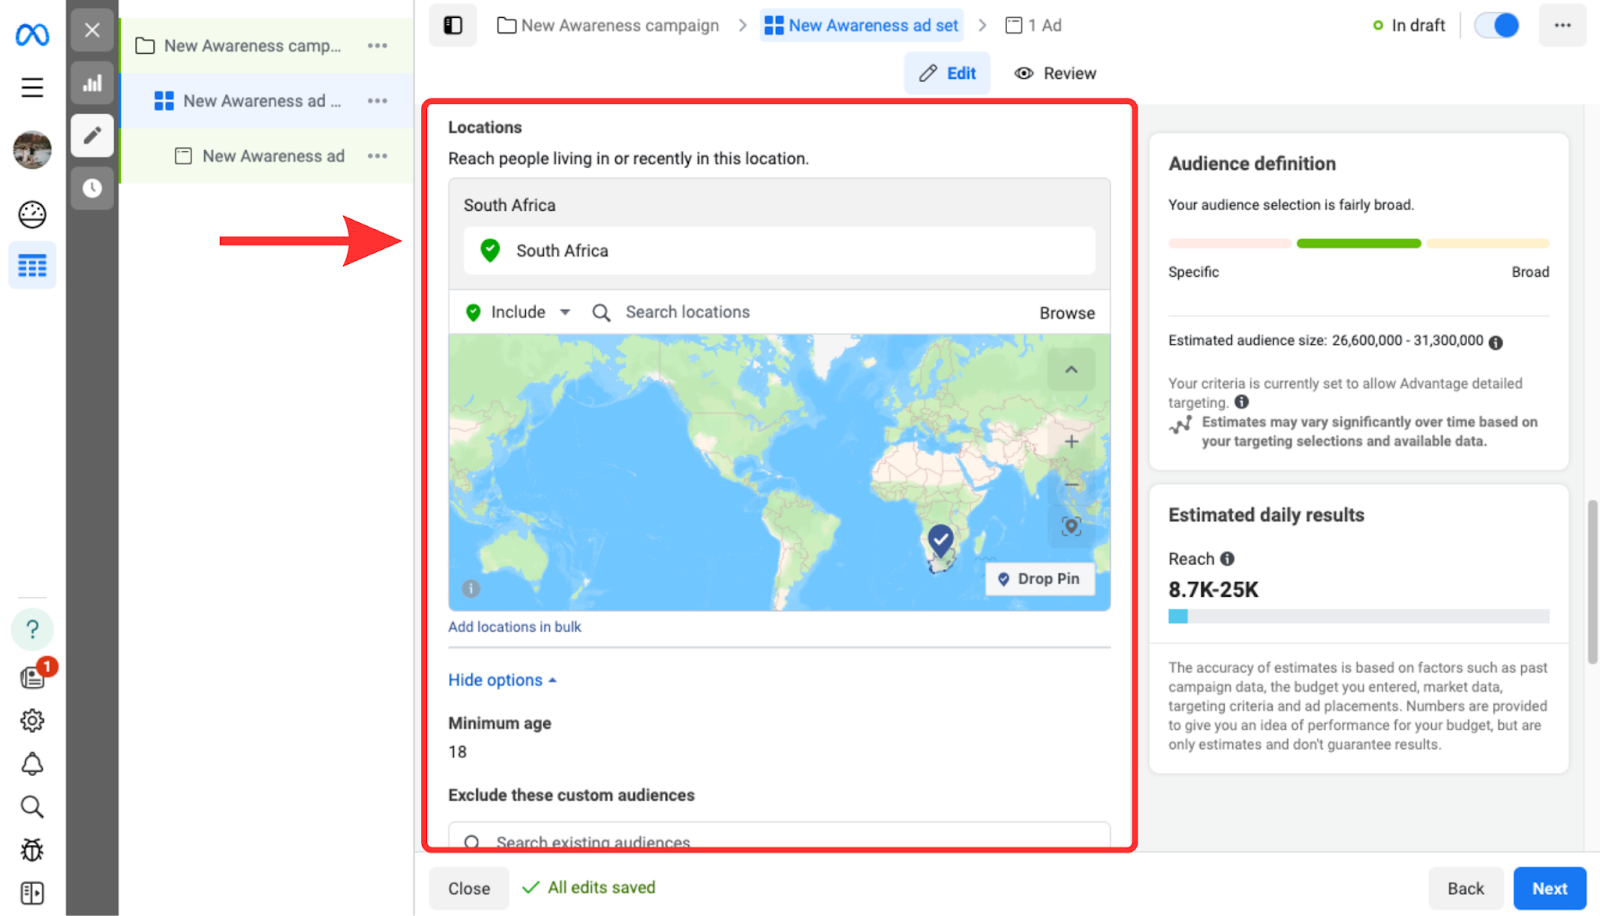
Pro Tip: Create lookalike audiences to reach new people who are similar to your best consumers.
Step 4: Set the Budget
Determine how much you’re willing to spend on your campaign. You can set a daily or lifetime budget, depending on how long your ad will run. Make sure your budget aligns with your campaign goals and expected lead cost.
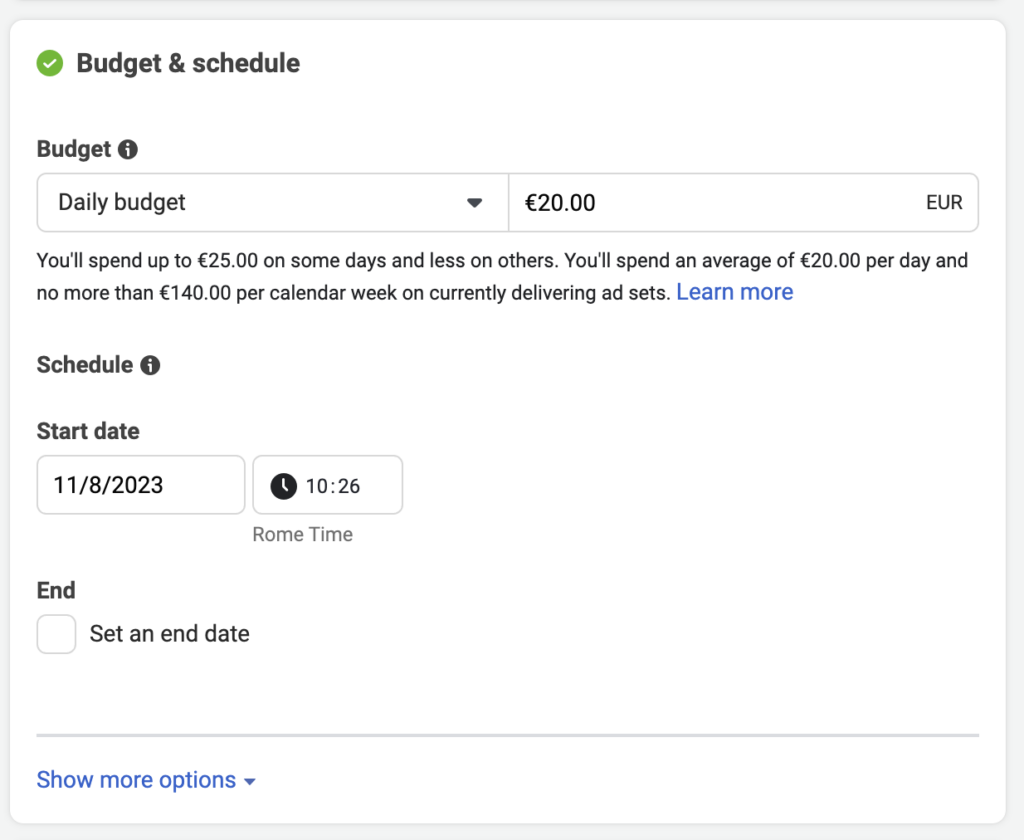
Pro Tip: Start with a modest budget and scale up based on performance. Allocate more budget to high-performing ads and pause underperforming ones.
Step 5: Create Your Ad Content
Your ad content is the hook that draws people in. Use a strong headline, a compelling description, and a clear call to action. The visuals should be eye-catching, whether it’s a video, image, or carousel.
Pro Tip: Keep your messaging clear and concise. Highlight the value proposition right away, and use action-oriented language to encourage clicks.
Step 6: Design Your Lead Form
The lead form is where you collect valuable information from prospects. Keep it short, ask only for essential details like name, email, and phone number. The easier the form is to fill out, the higher the conversion rate.
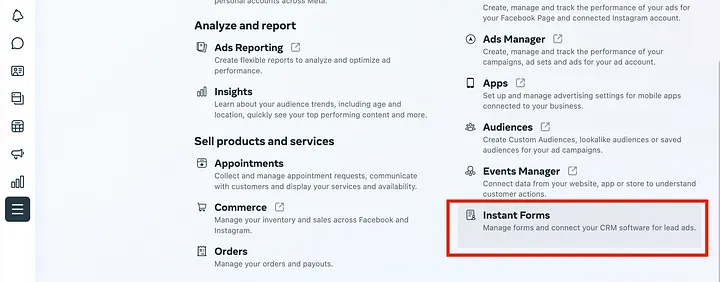
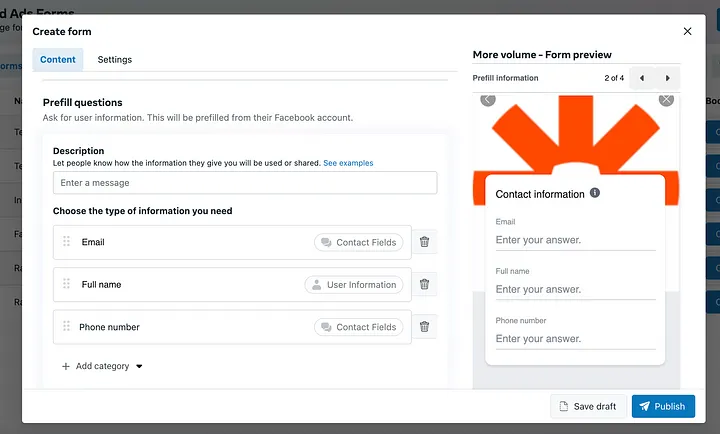
Pro Tip: Use custom questions to qualify leads and add a thank-you screen with a clear next step, like visiting your website or downloading a resource.
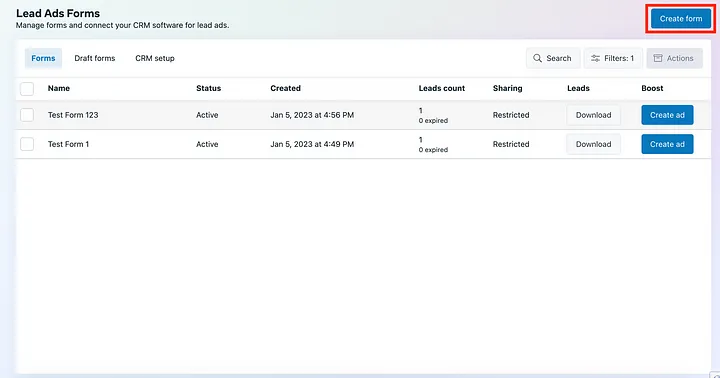
Step 7: Review & Publish
Before hitting “Publish,” review everything! Check your targeting, budget, ad content, and lead form settings. Make sure all links work and that your ad aligns with Facebook’s advertising policies.
Pro Tip: Preview your ad on both mobile and desktop to ensure it looks great across all devices.
Step 8: Monitor & Optimize
Once your ad is live, keep an eye on its performance through Facebook Ads Manager. Track metrics like cost per lead, click-through rate, and conversion rate. Make necessary adjustments to improve performance.
Pro Tip: Test different versions of your ad with A/B testing. Experiment with headlines, visuals, and CTAs to see what resounds best with your audience.
Close the Gap Between Sales and Marketing with AdHub
To better track your ad campaign results, AdHub is your ultimate mobile app. Simply download, sign up, and integrate your Meta business page with AdHub. With seamless campaign syncing, leads flow directly into the app—no more manual downloads!
AdHub’s flexible monitoring lets you track each ad individually, analyze performance, and stay on top of lead results. By automating lead capture, your sales team can focus on what they do best: delivering quick responses and converting prospects into clients.
Keeping all leads in one place bridges the gap between sales and marketing, ensuring valuable information is never lost. With AdHub, every lead is captured, every opportunity is maximized, and every response is prompt.